I got my inspiration from this pin. The link on the pin doesn't take you to the original source, though. Check out the original source at My Creative Departure.
Here are my materials. Just some tacky glue, 8x10 picture frame, and a bag of conversation hearts.

I really wish I'd bought name brand conversation hearts. This bag was from Dollar Tree. There were just a few different colors and they were all pastel--not brights like you find in a normal bag. Plus, the candy is a lot softer than regular conversation hearts. So I'm a little bit worried that it will disintegrate before Valentine's Day even comes! Oh well. Time will tell.
First I took the glass out of the frame and cleaned it with Windex.

I skipped over the whole part about painting the frame. I like black frames.
Next, I opened up the candy and poured the conversation hearts on a paper towel.

See how light they are? They were also very chalky--meaning they leave residue on your fingers. Plus, the words are just etched in--not in a different color. That made me sad, but I continued anyway.

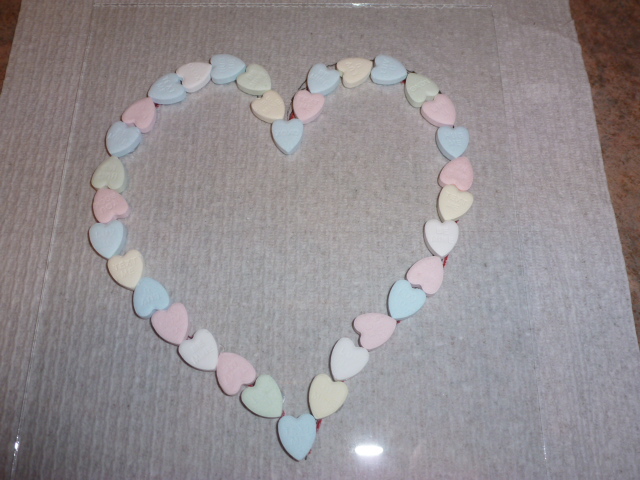
I started placing my candy on the glass and made a heart outline.

It wasn't exactly centered (but in hindsight, it was pretty darn close!), so I took the hearts off the glass. I drew a heart outline on the paper towel and put the glass on top of it.

I started filling up the outline again.

I glued the outline down before I started filling in the heart. I left all the candies in place and picked them up one at a time. I put a little dab of tacky glue on the back of the candy and pushed it down on the glass. I pressed firmly for a couple of seconds before moving on to the next heart.
After my outline was glued, I started rearranging the candies in the center. This was a little bit like a puzzle. You had to turn the hearts various ways to get them all to fit.

I followed the same procedure as the outline. I picked up only one conversation heart at a time, put a dab of glue on it, and put it back in place before moving on to the next one. This was tricky! The hearts were so close together it was a little hard to lift them up and squeeze them back in. Plus, sometimes I forgot which ones I'd already glued.

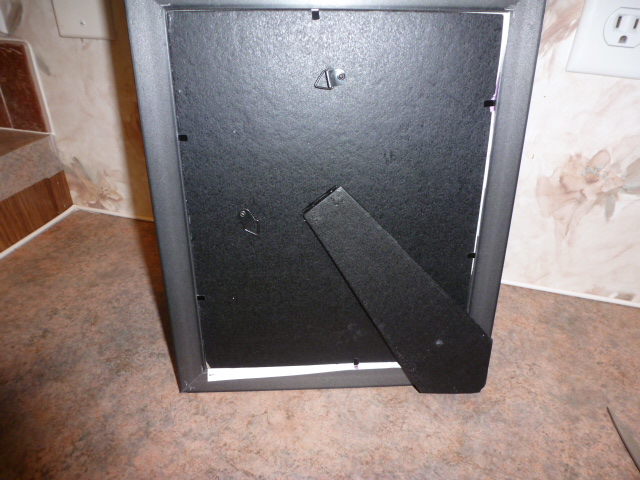
The whole process of organizing and gluing all the conversation hearts took about 2 hours. Aaahhh! Here's what it looks like from the back. You can see the glue.

I noticed there was a bit of a funky space down at the bottom. I didn't like that.

So I pulled up that bottom conversation heart and turned it sideways. That left a bit of residue and it crumbled just a tiny bit, but I don't think it left a noticeable flaw. I like the placement much more. I let it dry overnight.

I didn't have a nice colored wall to put my Conversation Heart Art up against, so I wanted some sort of background. I don't have any fancy scrapbook paper, so I printed out four different text boxes on my my printer and held it behind the glass. I decided I liked the purple the best. The bright pinks were just all wrong and the light pink blended in to much.

I had to trim the paper just a bit to get it to fit into the frame.

The edges are still hanging out, but I didn't mind since the back wouldn't be showing.
I like the purple behind it. It's a nice contrast.

All done! The lighting isn't great. I think it looks better in person than it does in the picture.


I wish I had the better quality conversation hearts--I think I would've LOVED it then. For now, I like it okay. Maybe I'll like it more when I have it up on the mantle with other Valentine's Day decorations. I just hope the candy holds up until then!
Would I make it again? Probably not, at least not using those same conversation hearts. But it's a nice seasonal project and I like getting my craft on each week. Hopefully I'll have another Valentine's Day craft to share next week.
No comments:
Post a Comment